
My friend Priya texted me a photo last spring: an open cardboard box, a graphics card still wrapped in foam, and a caption that read "I think I bought a paperweight." She had collected every part for her first gaming PC and then froze, certain she would fry something the moment she touched it. Two hours later, after a video call where I mostly nodded and said "yeah, that clicks in," she had a working machine running Elden Ring at a steady frame rate.
That panic is so normal. Building a PC looks like surgery from the outside, but it is closer to assembling expensive furniture that happens to play Valorant. Nothing needs soldering. Almost every part only fits one way, and the case practically tells you where things go.
So let us walk through it the way I walked Priya through it, slowly and without drama. By the end you will have a clear map from a pile of boxes to that first glorious BIOS screen.
Plan the parts before you buy anything
The build starts long before any screwdriver appears. Your job here is to make sure every component speaks the same language, because the most common first-timer mistake is buying a beautiful set of parts that simply do not work together.
A gaming PC needs eight core pieces: a CPU, a motherboard, RAM, a graphics card (GPU), storage, a power supply, a case, and a CPU cooler. Some CPUs ship with a cooler in the box, which is one less thing to think about.
The two relationships that trip people up are the CPU socket matching the motherboard, and the RAM type matching both. If you want a calmer deep-dive on that matching game, I wrote a full breakdown on choosing PC parts that actually fit together that pairs nicely with this guide.
Pick the resolution you want to play at before you spend a cent. A 1080p build and a high-refresh 1440p build ask very different things of your GPU. If you are torn, my comparison of 1080p versus 1440p gaming can settle it.
Gather your tools and clear a workspace
You need shockingly little. A single Phillips-head screwdriver handles roughly ninety percent of the build. A magnetic tip is a small luxury that saves a lot of swearing when a screw vanishes into the case.
Work on a large, hard surface like a kitchen table, not a carpet or your bed. Carpet builds static charge, and static is one of the few things that can quietly hurt components.
Keep the motherboard box nearby. The flat box lid makes a perfect tray for building the CPU and RAM onto the board before it ever goes into the case.
You do not need a fancy anti-static wrist strap, though they cost about $10 if you want peace of mind. Touching a bare metal part of the case every few minutes to discharge yourself is enough for most people.
Build the core on the bench
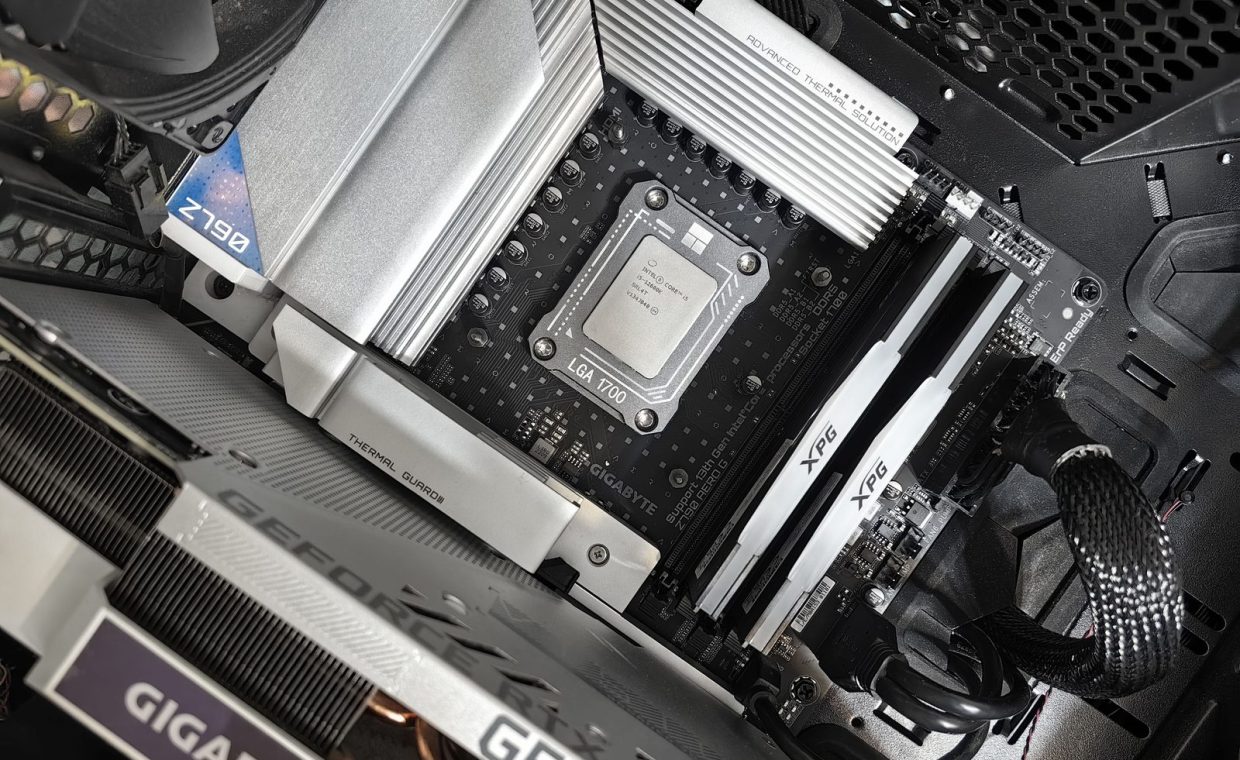
This is the part that feels intimidating and is actually the easiest. Lay the motherboard on its box and start with the brain.
Seat the CPU
Lift the small retention arm next to the CPU socket. The CPU has a tiny triangle in one corner that lines up with a matching triangle on the socket. Set it down gently, do not press, and lower the arm. It will feel like it is using too much force. That is normal and by design.
Install RAM and the M.2 drive
Push the RAM sticks into their slots until both clips snap shut. If you have two sticks and four slots, your motherboard manual will tell you which two slots to use, usually slots two and four, for the best performance. An NVMe M.2 drive slides into its slot at an angle and gets held down by one tiny screw.
Mount the cooler
Apply a small dot of thermal paste, roughly the size of a grain of rice, if your cooler did not come with it pre-applied. Then secure the cooler over the CPU and plug its fan into the header labeled CPU_FAN.
If your motherboard has a separate metal back plate (the I/O shield), snap it into the case before the motherboard goes in. Forgetting it means pulling the whole board back out later, and almost everyone does this at least once.
Drop everything into the case
Now the assembly moves into the case. Lower the motherboard onto the standoffs (the little raised brass posts) and line up the screw holes. Drive in the screws snug, not gorilla-tight.
Next comes the power supply, which usually mounts at the bottom rear with its fan facing down or out, depending on your case. Then slot in the graphics card. It clicks into the long PCIe slot nearest the CPU and gets screwed to the case bracket, exactly like the RAM but bigger.
Take your time with cables. Route them behind the motherboard tray where you can, both for airflow and because a tidy build is genuinely easier to troubleshoot.
Connect the cables that make it breathe
Cabling is where most first-timers slow to a crawl, so go header by header. There are really only a handful of connections that matter.
| Cable | Plugs from | Plugs into |
|---|---|---|
| 24-pin | Power supply | Long motherboard slot |
| 8-pin (4+4) CPU | Power supply | Top corner of board |
| PCIe power | Power supply | Graphics card |
| SATA power/data | PSU and board | Any 2.5-inch SSD or hard drive |
| Front panel | Case | Tiny pins (power button, LEDs) |
The front-panel connectors are the fiddliest part of the entire build. They are tiny and the labels are small, so keep your motherboard manual open to that exact page and plug them in one at a time.
First boot and BIOS
Before you close the side panel, do a test boot. Plug in your monitor, keyboard, and power cable, then press the power button. If fans spin and you see a logo, exhale, because you just built a working computer.
Tap Delete or F2 to enter the BIOS. Two things to check: that your RAM is running at its rated speed (look for an XMP or EXPO setting and enable it), and that all your storage shows up. If a fan does not spin, the usual culprit is the 8-pin CPU power cable not being fully seated.
"POST" just means the PC passed its self-check and reached the BIOS. From here you install your operating system from a USB drive, then download the latest GPU drivers. That driver step alone can lift your frame rates noticeably.
Install, tune, and play
With the OS installed, grab your launchers (Steam, your GPU control panel) and load something you love. I always test with two games: one demanding title like Baldur's Gate 3 to stress the GPU, and one easygoing pick like Stardew Valley to confirm everything is stable and quiet.
If the numbers come in lower than you hoped, do not panic and do not assume you bought the wrong card. A lot of free performance hides in settings and drivers. My walkthrough on how to boost FPS without spending extra money covers the dials that matter most before you ever think about upgrading.
Plan compatible parts, build the CPU and RAM on the bench, mount everything in the case, connect power and front-panel cables, test boot into BIOS, enable your memory profile, install the OS and drivers, then play.
How long does a first build usually take?
Plan for an unhurried afternoon, roughly 3-5 hours for a first timer. The physical assembly is quick once you start, but the front-panel cables and your first BIOS trip eat time, and that is completely fine.
What if I press the power button and nothing happens?
Nine times out of ten it is power: check that the 24-pin and the 8-pin CPU cables are fully clicked in, and that the power supply switch on the back is flipped to on. Re-seating the front-panel power pins is the next thing to try.
Is building cheaper than buying a prebuilt?
Often a little, but the bigger wins are control and knowledge. You choose every part, you skip bloatware, and when something needs upgrading later you already know exactly how your machine fits together.
Priya still messages me whenever she swaps a part, and she has not called anything a paperweight since. That is the real reward of doing this yourself: the box on your desk stops being a mystery and starts being something you understand. Take it slow, keep the manual open, and enjoy that first boot. You earned it.