
The first time I peeked behind the motherboard tray of my own build, I almost laughed. The front panel was tidy, the glass side looked like a magazine photo, but the back was a hairball of black sleeves crammed shut by a panel I had to body-slam into place. It worked. It also ran hotter than it should have, and every upgrade after that felt like defusing a bomb.
Cable management is the part of building that people either obsess over or completely ignore, and both extremes cause problems. You do not need to braid your wires like a show car. You just need to avoid a handful of mistakes that quietly hurt airflow, temperatures, and your future sanity.
Here are the errors I see most often, why each one costs you, and the small fix that turns a messy case into a clean, breathable one.
Treating cables as an afterthought
The single biggest mistake is plugging everything in first and "dealing with the wires later." Later never comes. You end up working around a mess instead of preventing it.
This costs you in two ways. Cables draped across the front intake choke the airflow your fans are fighting to pull in, and a tangled front means dust collects faster and components run a few degrees warmer over time.
Before you mount the motherboard, route the chunky cables (the 24-pin, the CPU power, the front panel header bundle) through your case's grommets and out the back. Plan the path while the case is empty and easy to reach.
Think of it like setting up a desk. You would not run power strips and monitor cables only after the desk is fully loaded, and a good clean battlestation desk setup follows the same logic: route first, populate second.
Ignoring the back of the case entirely
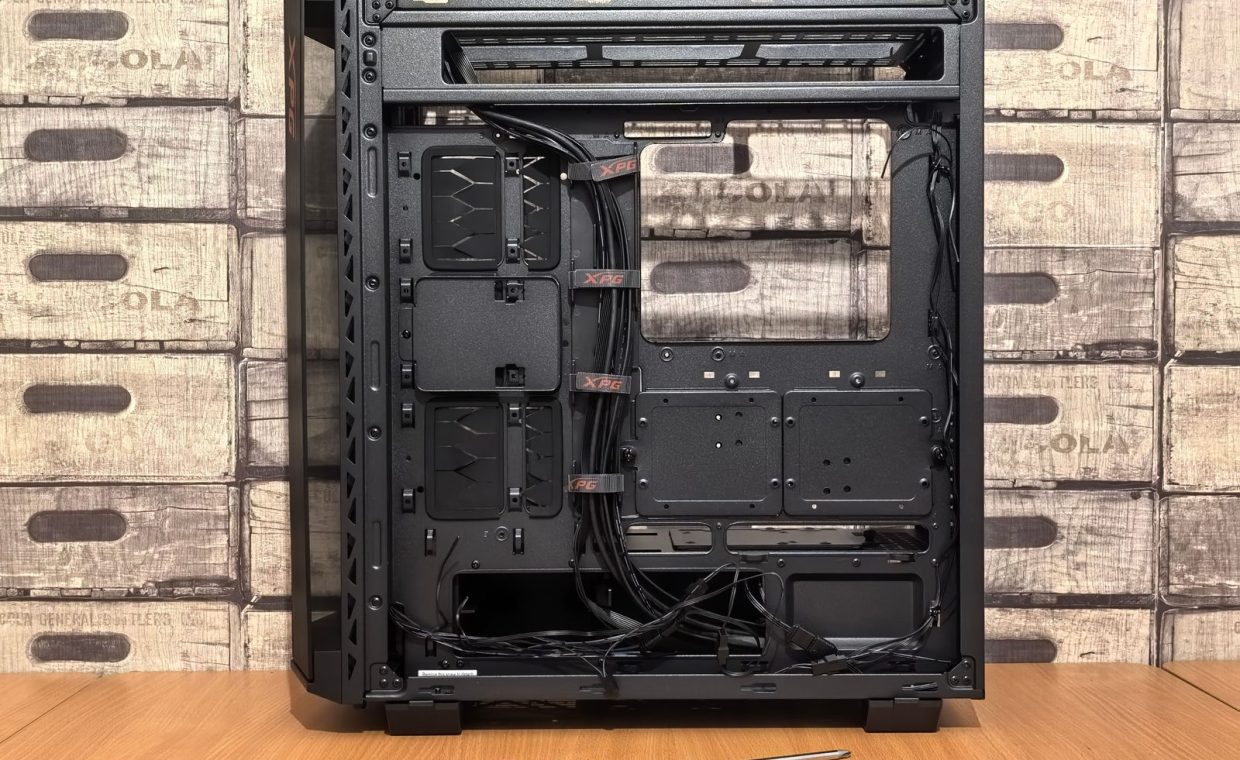
People polish the visible side and let the back become a junk drawer. The problem is that most modern cases only give you a limited gap behind the motherboard tray, often less than an inch, and stuffing it full means the side panel bulges or refuses to close.
A panel that will not seal flush leaves gaps that mess with the case's intended air pressure. It also looks rough the moment anyone glances at the side.
The fix: spread, do not pile
Instead of bunching cables into one fat lump, fan them out across the tray and use the tie-down points the manufacturer built in. Run them flat and parallel where you can. A flat ribbon of cables takes up far less depth than a round bundle of the same wires.
If the back panel needs a shoulder to close, you have too much volume in one spot. Stop, undo the worst knot, and redistribute before you force anything.
Skipping the velcro and zip ties
Loose cables are the enemy of clean airflow. When wires float freely, they sag into fan blades, block intakes, and turn every future change into a scavenger hunt.
I know the temptation. The build powers on, the game launches, and securing wires feels like homework. But ten minutes of tying now saves you an hour of frustration the next time you swap a part.
- Use velcro straps for anything you will touch again, like GPU power or storage cables, since you can reopen them in seconds.
- Use zip ties for permanent runs, but cut the tail flush so it does not snag.
- Anchor to the tray, not to other cables, so the bundle stays put instead of drifting.
Cranking a zip tie hard around a bundle can pinch or deform thinner wires over months of heat cycling. Snug is the goal, not a tourniquet. If the cables can shift slightly when you tug them, you are fine.
Forcing wires across the airflow path
This one is sneaky because the build can look clean and still breathe badly. If a thick cable cuts straight across your front-to-back airflow, it acts like a wall in a wind tunnel.
The classic offender is the 8-pin CPU power cable stretched diagonally over the top of the cooler, sitting right where the intake air wants to travel toward the radiator or rear exhaust. It is right in the worst possible lane.
The fix is to route along the edges of the airflow, never through the middle. Tuck the CPU cable up the side and across the top edge of the tray so it drops down to the connector from above. Keep the open center of the case as clear as you can, the same way you would keep a clear sightline between two screens when you set up dual monitors for gaming so nothing blocks the path that matters.
Leaving unused PSU cables hanging
If you have a modular or semi-modular power supply, every cable you do not need is one you should not plug in. Yet so many builds carry a nest of unused SATA and peripheral connectors dangling in the bottom chamber for no reason.
Those spare leads block the PSU shroud vents, trap heat near the power supply, and add clutter you have to fight past during upgrades. They earn their keep zero percent of the time.
Only connect the cables your parts actually use. If your build has one SSD and no extra drives, you do not need three daisy-chained SATA power leads coiled in the basement. Leave the rest in the PSU box.
While you are thinking about what plugs in where, this is a good moment to reconsider your peripherals too. The debate over wired versus wireless gaming mice is partly about feel and latency, but it is also about how many cables end up snaking across your desk and into the case area. Fewer wires up top means less to manage everywhere.
Forgetting about future upgrades
A build that looks perfect today but turns into surgery tomorrow is not actually well managed. If you have to undo your entire harness just to add a stick of RAM or a second drive, the tidiness was skin deep.
The cost here is real time and real risk. Every time you yank components loose, you flirt with bent pins, dislodged coolers, and that sinking feeling when a screw vanishes into the PSU shroud forever.
Build for the next change, not just this one
Leave a little slack near connectors you expect to revisit, like RAM-adjacent fan headers and your front storage bays. Use reopenable velcro on those runs. The point is a system you can open, adjust, and close again without a full teardown.
| Mistake | What it costs | The fix |
|---|---|---|
| Cables as an afterthought | Blocked intake, higher temps | Route big cables before mounting parts |
| Ignoring the back | Bulging panel, broken air pressure | Spread cables flat across the tray |
| No straps or ties | Sagging wires, fan contact | Velcro for reopens, zip ties for permanent runs |
| Wires across airflow | Disrupted cooling path | Route along edges, keep the center clear |
| Unused PSU cables | Blocked vents, trapped heat | Plug in only what your parts need |
| No upgrade planning | Full teardown for small changes | Leave slack, use reopenable straps |
How clean is clean enough?
Here is the part people forget: airflow does not care if your cables look pretty. It cares whether the paths are clear. A build with a few visible wires that all hug the edges will run cooler and quieter than a "perfect" build that hides cables in a heat-trapping wad behind the tray.
So set a realistic bar. Front looks tidy, center stays open, back panel closes without a fight, and you can reach the parts you might upgrade. Hit those four and your case is in great shape, whether you are running a compact rig next to a Steam Deck or a full tower built for marathon Baldur's Gate 3 sessions.
Plan cable routes before you mount parts, keep the center of the case clear, only plug in the PSU cables you need, and leave yourself room to upgrade. Tidy is nice, but breathable and serviceable is what actually matters.
Does cable management really affect temperatures that much?
It will not transform a build, but it is real. Cables blocking intakes or cutting across the airflow path can add a few degrees and make fans work harder, which means more noise. Clearing those paths is an easy win, especially in smaller cases with tight clearances.
Are zip ties or velcro straps better?
Use both. Zip ties are great for permanent runs that you will never touch again, since they hold tight and cost almost nothing. Velcro straps are better anywhere you expect to make changes, like GPU power or storage, because you can reopen them without cutting anything.
My side panel will not close. What went wrong?
Almost always too much cable volume bunched in one spot behind the tray. Open it back up, find the fattest knot, and spread those wires out flat and parallel instead of piling them. A flat ribbon takes up far less depth than a round bundle, and the panel should seat without force.
None of this needs to be intimidating, and you do not have to nail it on the first try. My own builds got cleaner every time I opened them up, learned what I had over-stuffed, and did it slightly better. Start with the big cables, keep the airflow lanes open, and let the rest come with practice. Your future self, mid-upgrade at midnight, will thank you.